A guide to creating healthy, intelligent, test driven github repositories

When looking at a well developed project on github I often find myself impressed and surprised with how many integrated utilities can be applied to a project. Each adds their own flavour and functionality, while leaving a small footprint within the project. Taming the extra utilities often seems daunting to newcomers but as it turns out setting up a healthy, intelligent, and test driven github repository is much easier than one would imagine!

~

README & .GITIGNORE

One thing I’ve come to appreciate lately are well laid out, and informative READMEs. It’s often the first thing a user will look at when viewing a project and acts as the metaphorical doormat.

A README’s goals are to;

  • describe the project, its scope, and its general outline
  • provide steps to locally recreate the project
  • illustrate how to perform the testing functions
  • define how others can, if at all, participate with the project

Luckily much of this is done for us and requires minimal setup!

  1. In the root of your project, create a file with the name README.md
  2. Using your favourite editor add each needed part from above. psst.. don’t know what to include? others have created templates that we can use, you can check the one I use here.

That’s it! A beautiful README. Having a welcome mat is a nice touch isn’t it?

 ~ & ~

Unlike README’s .gitignore’s intend to hide pieces of the local project. While merging a local .git repository to a upstream remote, the .git service looks for a .gitignore file in the project root, then using filename recognition it chooses what to push to the remote. This saves the programmer the headache of sorting out what files / folders should be applied to a commit.

A .gitignore’s goals are to;

  • identify which files / folders are to be ignored when merging local repositories with upstream remotes

The steps are just as simple;

  1. Create a file called .gitignore
  2. Using your favourite editor, add it to the files and folders you wish to have ignored when you push your commits. Like the README we can take advantage of others hard work (though acknowledgment of work is important) by using templates provided online. Personally, I recommend githubs.

~

Licenses

I’m not a lawyer. I’ll start with that and have it over with, much like my professor who told us the exact same thing, I cannot and should not be asked to provide any sort of legal advice.

Moving on, including a license may not seem important but it actually is. No respectable user base will touch your code if it does not contain one. Furthermore, it provides potential contributors a chance to understand your vision for the project.

The goals of a License are;

  • To provide protection against potential legal action that would be taken against you for your open source projects use
  • To add legal legitimacy to your work

However, before anything else it is important to understand the potential licenses that can be used. To assist, here are a few of the common ones used in open source;

You’ll notice on the left most side that each license has requirements that the holder of the license must fulfill, make note of these.

The steps to add a license to your github repository are;

  1. Create a file with the name LICENSE
  2. Using your favourite editor, include the required text for the license you’ve selected, making sure to edit the necessary parts as required.

After that you’ll notice that while on github.com clicking on your newly uploaded LICENSE file will open a summary of your license, similar to the links above.

Screenshot from 2017-11-23 17-16-16.png

~

Continuous Integration

As we begin to understand how to more efficiently and quickly create projects of varying sizes, we also begin to recognize the need for some form of standard automated testing. A short time ago it would have sufficed to have a single, or small group, of people  maintain their source code’s health by managing the various testing, branching and merging needs, however, because of the complex nature we see what many projects evolve into, this is no longer the case. Automated CI’s services offer a passive set of eyes to be ever vigilant on a project, not eliminating the need for programmers to be mindful but increasing the potential for issues to be caught earlier.

As with the above, most of this is done for us again, as a few open source projects provide exactly what we are looking for, which is cloud space and automated testing. I recommend using TravisCI. As of the day of writing this, TravisCI is free to use with all open source projects.

You can check TravisCI out here.

The steps for adding TravisCI are explained best on their site.

However the steps are;

  1. On the travisCI site grant access to a repository you wish to integrate
  2. Add a .travis.yaml file to your project
    • This file is the blueprint to a project, the travisCI agent uses it to create a virtual instance of the project, then runs included tests
    • travisCI is also shown in github, you’ll notice once added all of your previous commits will begin building
  3. trigger the travisCI by making a push

Provided below is a example of a travisCI.yml I created for a project that I was working on recently.

This project was using Django and python’s unittest library.

Screenshot from 2017-11-23 17-00-27

~

So that’s it, those are the basics of creating a healthy, intelligent, test driven github repository. It doesn’t take long to complete and it adds a layer of professionalism that isn’t overlooked by interested contributors.

OSD – Release 2.0

Bug – Spirit typing in wrong channel during direct message

During one of my off nights I was on discord, talking with my clan-mates and helping them register their accounts to Spirit when I had noticed an odd behavior from the bot. During their registration, while Spirit should have been communicating with the individual user through a direct message channel, I noticed its typing animation would instead show briefly in our general chat channel. My interest peaked, I found an issue within Spirit’ developer Trello board that happened to be what I had noticed, and took it upon myself to investigate and fix this issue.

Investigation

Like any good detective I began by collecting all information I thought might be relevant, and created a checklist to work through.

My findings included;

  • This happened during registration
  • Spirit was typing, just in the wrong channel
  • It wasn’t blocking, or failing Spirit, therefor it was likely an asynchronous task

Using these findings I began to explore the source and quickly found exactly what I was looking for.

Spirit had a file named registration that held the source for the registration command. In the commands source, a function did in fact initiate the typing animation I had seen. I was an asynchronous task.

Exploration

Having found what I believed was the root of the issue, I next needed to expand my knowledge of the discord API. This took roughly 2 hours of reading documents but I was able to find what I believed to be a proper solution.

I implemented the fix and restarted the bot, but upon executing the register command, I was met with an unfortunate error, one of many to come. After spending some time unsuccessfully tying various command calls, I discovered that Spirit itself didn’t have access to all of the Discord functions, being a subclass. This left me with a need to find which commands were callable, without seeing the source, and, after some more investigation I identified a potential solution;

print([method_name for method_name in dir(subclass) 
    if callable(getattr(subclass, method_name))])

These two lines of code are to a programmer as a pry bar is to a mechanic, sometimes you just have to rip the hood off to see what’s inside, and it does just that.

With this I was able to identify what was callable by the bot.

Solution

My first solution was to add a simple command to the manager for Spirit to call when private messaging, however, the primary developer informed me that he had intentions to redo much of that code base, and was unsure if there would be a need for the function since it seemed to be only used once.
After talking about it we opted to instead approach as minimalists and only implement the line where it was used.

You can find the Pull Request containing the code fix here


~ ~ ~


Feature – Adding clan command

A common request from the growing community around Spirit was for the addition of a  clan command feature in which various stats could be displayed by the bot about their clan. I choose to try and accomplish this request because I knew it would be challenging, building upon my previous experience with the bot, as well as requiring me to go outside of my comfort zone, and learn how to interact with a complex API / manifest.

Investigation (Might need a new format?)

Starting this feature required me to expand my knowledge on a few things;

  1. I needed to better understand the API endpoints of Destiny2
  2. I needed to better understand how a command was defined and used

As I have mentioned before to better understand the Destiny2 API endpoints I took advantage of an API development environment known as POSTMAN. This software allowed me to interact with the API through GET and POST calls returning prettified json. This tool was very helpful as it allowed me to explore various ways to get desired information from the API, however to my dismay, much of the data I received was very basic, being either plain text or hashed values. Regardless the information I was able to gleam from the API endpoints would be used as the starting point to the clan command.


Exploration

My next motivation was to learn how to define a command and make it callable by spirit. First I would need to make a change to a python package that was used by Spirit, pydest, which is an asynchronous API wrapper, and second I would need to make the command callable by the Spirit bot.

Starting with pydest I created the functions to interact with the Destiny2 API. This wasn’t difficult as I had many examples of other API interactions to read and understand in the package already, however, when I finished and tried to update my version I ran into a huge problem.. my python virtual environments pip wheel was very broken. While fixing the problem I learned a few tricks;

If you create a python virtual environment with a specific version (2.8, 3, 3.6), always call using the exact version. This is because a virtual environment only changes the PATH to the python version that was specified, so in order to interact with the python in the virtual environment it requires the version explicitly. As well, to interact with the pip wheel of the virtual environment call the specific python version it was created with.

This is an example of how I updated my pip wheel with my updated pydest package
updating-python.png

In this case, I’m using my (spirit) python virtual environment, that was created with python3 and updating the pip wheel’s pydest.

Once that was fixed making the button callable was a matter of more investigation in to other examples of commands within the bot and trial and error.


The only other difficulty I experienced before putting the finishing touches on the feature was interacting with the Destiny2 API Manifest. As I had mentioned above, most of the data that was retrieved from the Destiny2 endpoints were hashes, which by themselves, were useless but I did understand that the hashes represented something more complex, and so it became a matter of getting them out.

This took me the longest amount of time as the doc I found on how to interact with the manifest were old and sparse. My salvation came when I found a very old forum post on Bungie which I replied to, and impressively, not 5 minutes later a developer at Bungie contacted me and explained how they moved the doc to a github docs page and  provided me with a link.
The new doc were good but often confusing to understand, but after much trial and error, I was able to receive the data I wished to obtain and using it completed the rest of the command.

Solution

With my clan command completed and full of useful information, it was time for touch ups. Interestingly I thought this would be short work but things often don’t go as planned. As it turns out, Discord embedded messages don’t stylize very well and so I had to come up with a creative solution for adding emojis into a Discord embedded message. I tried many different formatting tricks but nothing worked, so I ended up needing to use whitespace and a conditional to explicitly determine positioning. Though creative I feel like this was a mediocre solution and wish to investigate if a better solution would be possible.

Overall the command presents all of its requirements well and the result is pretty good though I think.Spirit-clan-command.png

~ ~ ~

Conclusion

My time in OSD was fantastic, the knowledge I learned was insightful, interesting and most importantly relevant.  Our professor, David Humphrey, truly is one of Seneca’s finest professors, showing respect to his profession and students by always being helpful and knowledgeable while keeping his classes down to earth and understandable. I would recommend this class to anyone who wishes to learn more about open source, or has a passion for the field of computer programming.

OSD – Release 2.0 planning

As my Seneca open source class comes to an end, we have been asked to reflect back on what we have done, and look ahead and plan a strategy for our last contribution to the class.

David Humphrey is an amazing teacher, truly one of the most knowledgeable and passionate professors we have at Seneca. Through his guidance I feel like my skills and understanding of many open source topics, integrations, and tricks have become honed and useful, and I look forward to implementing each into my day to day work.

My release 2.0 will be made up of the following features, each having been chosen because I believe they add value to my current knowledge path;


Bug – Spirit typing in wrong channel during direct message

During one of my off nights I was on discord, talking with my clan-mates and helping them register their accounts to Spirit when I had noticed an odd behavior from the bot. During their registration, while Spirit should have been communicating with the individual user through a direct message channel, I noticed its typing animation would instead show briefly in our general chat channel. My interest peaked, I found an issue within Spirit’ developer Trello board that happened to be what I had noticed, and took it upon myself to investigate and fix this issue.

It was actually rather interesting addressing this issue because it required me to build my knowledge of both the Discord and Destiny2 API’s, as well as learning how asynchronous tasks worked in Python.

Feature request – Add flawless record to trials command

The trials command was the second contribution I made to Spirit, and though the command is finished and being added in the next release, one of the most request features of the command was to show the users ‘flawless’ record. This has yet to be achieved due to the complications of finding the record, which apparently is not a provided value given by the API and is instead calculated.

Investigation has begun using a API development environment called Postman.

Feature request – Add clan command

This will be the largest work load of my release 2.0, requiring me to contribute to not only Spirit, but the server manager as well. I’m very excited to begin working on this feature as it will combined all of the knowledge I have gained from my release 1.0, as well as teach me new aspects of the source I haven’t yet looked at.

~ ~ ~

You’ll be able to read more about the solutions in the upcoming OSD – Release 2.0
blog!

Acknowledgements
Photo by Glenn Carstens-Peters on Unsplash

The programmer itch

Finding a project to contribute too can be the most stressful and time-consuming part of open source. The most available and straight forward approach is to sift through dozens of potential candidates until one is found intriguing or aligning with our goals. However, this can quickly become tedious and discouraging.

One thing that I find important when considering an open source project is my level of interest towards it. Unlike the work given to us in our daily lives, joining an open source project grants us freedom to pursue our passions and choose what is worth our time.

Today, I want to tell a story of how I got involved in an amazing new project. Unlike the above, scrolling through potential candidates, I was simply using a software and became curious about if it was free.

~ ~ ~

Recently a new game called Destiny2 released on the PC. My clan and I were ecstatic to play. A few days prior to launch, I began working on our clan’s Discord server.

To those unfamiliar, Discord is an application that offers voice and text services to its users by allowing them to create or join servers. Each server begins bare, but clever tinkerers will find a plethora of potential integrations, bots and web hooks to be added.

I was in need of a bot for Destiny2 and so I took to Google for some research, in which I found an Discord bot named Spirit that was highly recommended within the community. After using it for a few minutes my head was full;

“This is amazing! How was it made? Is it open source? I wonder what language it’s written in.”
The programmer itch.

A github search revealed the bot was in fact open source, and the language it used was python!!!
The README provided a link to their Discord channel, and having started down the rabbit hole I resolved to jump in entirely.

I asked a few questions in the Discord chat, mostly just curiousness about Spirit, and kept working, not expecting to get a reply until maybe the next day. However, soon enough the *DA DING* of a notification had me back on the Spirit channel, and to my amazement I was speaking to the creator!

We spoke about his project, his desire to create it and his future plans, and near the end he asked if I wanted to help him with it. At the time, I had already stretched myself thin with other obligations and had to respectfully say no, and temporarily end our conversation.

A few weeks later I found the opportunity that I was hoping for when my open source professor opened the floor to what was available for us to work on in his class. The same day I contacted the creator excited about the news, and he seemed just as excited as I was, helping me to get my build working and to submit my first PR for his project within a few hours.

~ ~ ~

This method of finding a project was a new experience for me, since the first time was spent parsing through a large list of projects until one looked interesting. The organic nature, in which I found and became involved with Spirit was refreshing and encourages me to contribute the best work I possible can.


~ ~ ~

Edit: I can’t believe I forgot this…
Anyone who is interested can check Spirit out here!!!!


Sunday afternoon

Setting up a workstation is a much larger commitment than I anticipated. What started as a Sunday morning idle job quickly derailed and left me scrambling to fix a very broken OS installation, and all because of my impatience.

Having used Win10 on my desktop, I was familiar with the large amount of overhead that came along with the bulky OS. When I picked up my new laptop I decided that I would like to instead try out Ubuntu 16.04 but in a novice move, I choose to partition a part of my hard drive and run two separate OS’on a machine that simply could not handle the load. This was a huge mistake as the laptop went from acceptably slow, to unusable.

This past Sunday I decided to fix my greenhorn mistakes and move to a Ubuntu only OS, and after some initial hiccups getting my BIOS to see the bootable USB I was digitally off to the races.

With a fresh OS and a whole day worth of time to work ahead of me, I couldn’t have been more excited! I quickly began running as many installs as I could trying to get to a working state.

sudo, apt-get, install, git, clone, PATH=, conda, pip, source activate &

Repositories cloned, virtual environments created and paths set I was ready to begin working on this issue. Today I would finish this easy bug up and probably do three more!

build

underlying-error

Hmm….. Odd but I probably just missed a step.

reoccuring-error

Uh oh… I’ll just restart my laptop, if the It crowd has taught me anything, it’s that turning it off and on again usually helps.

reoccuring-error

… What if I delete one of the certificates in the site-packages!

No-Dir.png

Oh no…

This error took the rest of the day and some of the next to fix and turned what was supposed to be a productive day of work into a stressful and unresolved mess.

The underlying issue came from installing Anaconda to manage my python environments while building a docker container that was creating dependencies on the system’s python bin. This broke the pip wheel and resulted in the above error to display no matter what I did to remedy. The issue was further complicated as the multi-dependency was created during the update script and deleted afterward, making debugging impossible.

Ultimately I was not able to fix this manually and had to reinstall Ubuntu 16.04 OS again, this time taking the installs slow and testing at each step of the way to assure the installs were successful and the software and my builds were compatible. Taking the extra time and slowing down proved to be the solution as the error has not occurred and my builds are running smoothly.

So let’s try this again, I have a whole day of work planned and I excitedly begin.


Photo by Kevin on Unsplash

I just opened an issue, want it?


Open source encourages fluid action. From within their communities, ecosystems of requests and results are created. Although not every request will receive the same amount of attention as the other, this exchange of interest allows the community to anonymously guide the direction of the project.

This week I was assigned to my first issue, opted in to a mailing list for project updates and joined the community irc for my project! It was a very exciting week, my motivation was sky high and I was eager to show my skills…  and yet I didn’t fix the original issue at all, ll. Rather I learned a great lesson about participating in the ecosystem.

Having been assigned to my issue I first followed the advice that was provided to the previous bug fixer. Opening the Firefox dev tools, I took a look at the applied styles on the tag. The more I looked, the more I began to think the issue was not what was expected. A little lost for direction, I visited the irc and asked if anyone was around and familiar with the project, to which one individual said he would try to help. Unfortunately the individual was unable to assist me in figuring out the problem but asked me if I wanted to help him with an issue he had just posted instead. Stuck on my current issue but still wanting to help, I accepted and in no time had a fix for his issue, and after a few hiccups from git (turns out on large projects that we fork the repo and create Pull Requests from there.. who knew?) Iwas waiting proudly as the automated testing suite completed on my PR.


And so the ecosystem continues. As I am writing this, I’m simultaneously still working on the original issue. Having recently posted my findings, I now wait to see if someone has an opinion on the next steps. I find it interesting that I went from one issue to another by asking for help but the experience serves in showing that there are many entry points to get involved in open source, and no one way is right. I was happy to help the project, even if it wasn’t the way I had intended to originally, and thanks to the issue I took on, I now know how to work with git to create a PR that follows the project standards.

Catching my first bug

Like many others, my introduction to open source was by exploring Github in the early stages of my schooling. At the time I was only in need of a version control and had been told that Git was an important tool to learn and so I choose to investigate github and soon found myself wading through the massive amount of projects that were currently active and looking for contributors. One word sums up my first experience with the open source community.

Overwhelming.

As a new developer, I thought that the world of open source was beyond my skill level. I had no idea where to begin, let along how. I tried my hand at a few repos as a way to familiarize myself with git but nothing stuck and so ended my exploration into open source.

Until this week when I put my name out there on two currently open issues on the Mozzila/addons-server. I choose these issues because the addon-server project uses Django and python, two technologies I am personally using and desire to learn more about. Tackling these issues will provide me with a great opportunity to learn more about an interesting language and allow me to contribute to a global project.

I also have interest in the Balrog automation project and hope to pick up an interesting issue when I complete my current obligations.

I can’t wait to begin looking into these issues. The potential of having my code published is very aspiring and working on an amazing project such as Mozilla only serves to strengthen my resolve.


compare_editors(vim, VSC)

When I begin programming I often start with a shopping list of goals, but what I find myself overlooking is what tools I could use to make the tasks easier. Integrated development environments, for example, enable time savings, smarter work, and a better visualization of complex projects.

underlined

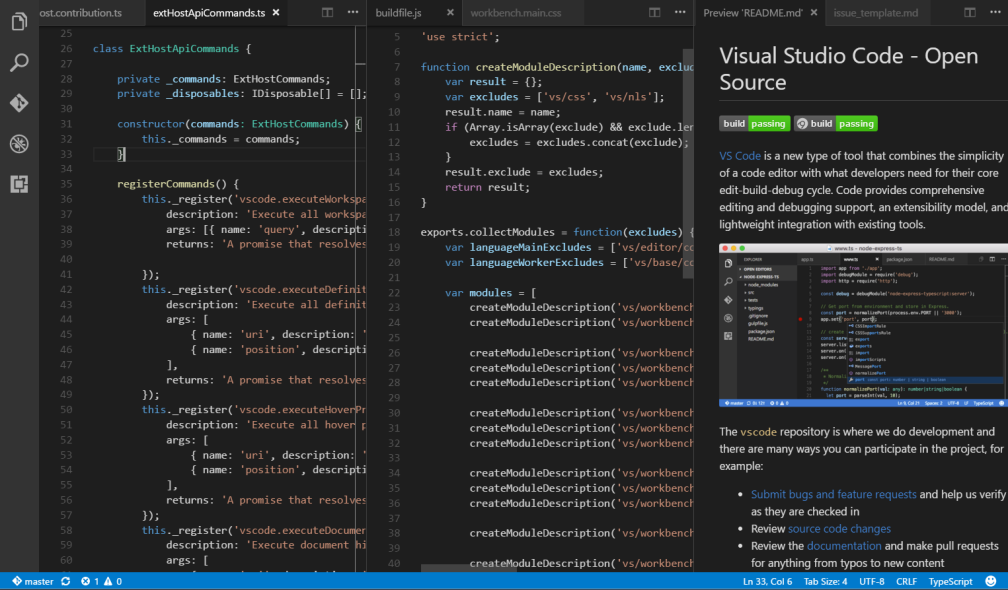
This week I took a look at some of the differences between, the old school vim which is the editor that I use most frequently and Visual Studio Code by Microsoft. I choose VSC because I was interested in finding out how much TLC Microsoft had put into the Linux distribution of their product.

Criteria

The things that I considered and tested for in both environments were;

  • How to open files and folders
  • How to change indenting
    • tabs or spaces
    • amount of spaces
  • Opening the editor from the terminal
  • How to find strings within files and projects
  • How to split screens
  • How to add extensions / addons

VSC

vim

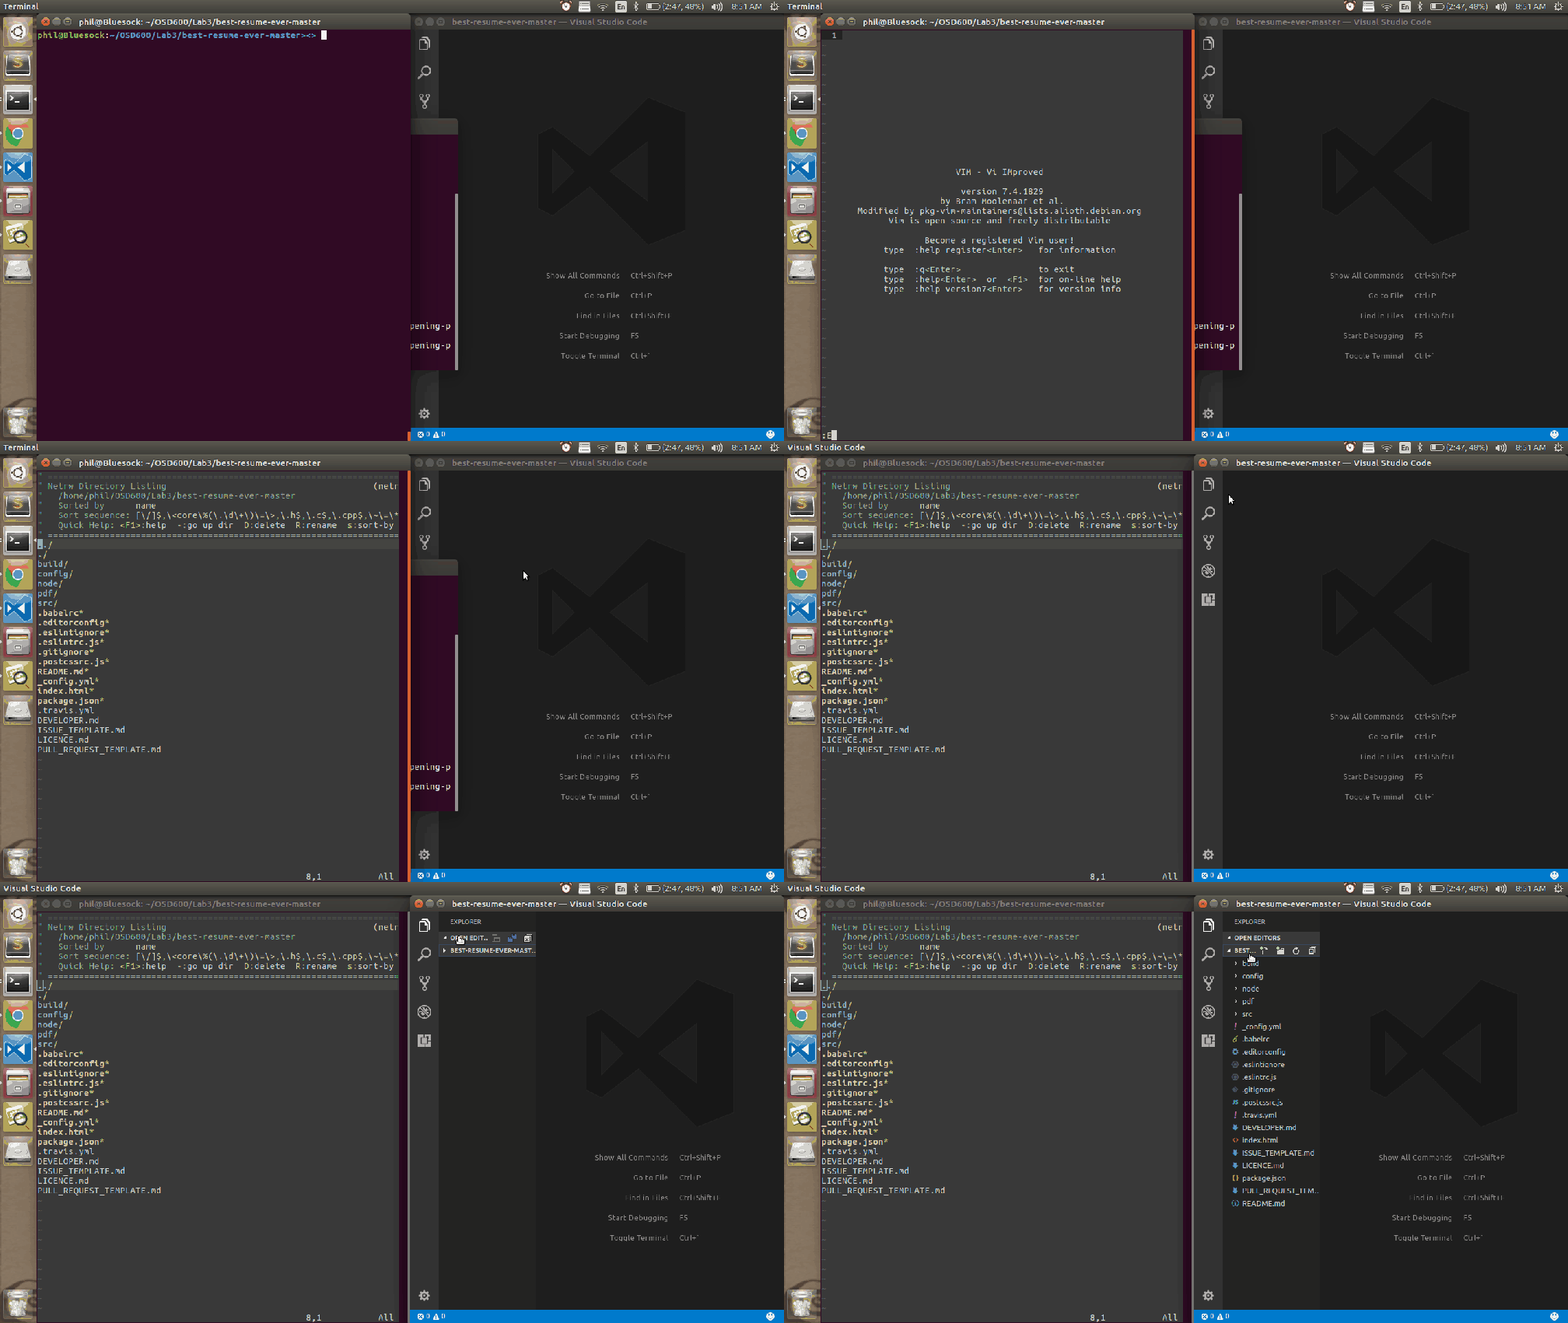
Files can be opened from the terminal with the command code <file>

Files and Folders can be open from the toolbar at the top of the program by clicking File >> Open File/Folder

Files are  by running the command vim <file>

Projects cannot be opened in vim as there is no native project explorer support.

Tab behavior, as well as all other personal preferences, can be changed via File >> Preferences >> Settings


A search bar appears to help navigate the current user settings.

  • tabSize denotes how many spaces are filled when tab is pressed
  • insertSpaces denotes if spaces or the special character \t  is used.
Tab behavior for vim is changed by modifying the .vimrc file. It can usually be found in the ~/home directory.

All settings can be globally applied or applied to specific file extensions. To change tab spacing permanently the following lines need to be added to the .vimrc file

  • set tabstop=4
  • set softtabstop=4
  • set shiftwidth=4
  • set expandtab


From the terminal, VSC can be opened with code <file> 

Useful flags include;

  • -d opens a diff on the two files.
  • -n  opens a new window.
  • -v Enables verbose output.
From the terminal vim can be called with vim <file>

I’ve not personally used any vim flags but the vim command line is very versatile.

Strings and regex can be used within files by pressing ctrl + f Regex and vim go together like PB&J. From the vim command line;

/<regex>/

String and regex can be done project-wide by pressing  ctrl + shift + f or by clicking the magnifying glass on the left toolbar. vim does not support this, alternatively use grep from the terminal.
Splitting the view can be done by clicking the newspaper looking icon near the top right of the editor. This is defaulted to a vertical split but can be changed by pressing alt + shift + 1/2 Use the vim command :sp <file> to split the view between the current file and the specified file.

  • ctrl + w + w (double click w) to change between views
  • :res+<#> to increase the current views window size
  • :res-<#> to decrease the current views window size
Adding extensions in VSC takes the same amount of clicks as opening a file.. this is less a feature and more an outright way of using the editor.

On the left toolbar, the bottom-most icon will open a window that is used for extension management.

Addons in vi are a bit complicated because they require some additional code in the .vimrc file.

Currently, I use Vundle to help manage my addons.


Project explorationopen_files_10

.vimrc plugins and tabs
tabs_and_addons.gif

Extensions

If I were to recommend 3 useful vim plugins they would be;

Vundle  a plugin manager for vi. This reduces the headache of adding plugins to the vimrc, making the experience much easier. You can check the project out here

Syntastic a syntax highlighter. It supports a large number of languages and is growing! You can check the project out here

Zenburn  not so much an extension as it is a color scheme for vi but I can’t praise it enough. The low contrast makes long hacks more manageable, especially for someone who likes their retinas. You can check the project out here

Bugs and glitches

For all of its grace, however, I did notice a rather irritating graphical glitch that happened often. graphical-error

This is frustrating as I had no idea what some of the icons meant and would have to move my cursor back and forth until the glitch ceased. A search of the open issues for VSC on Git revealed no other user having similar issues.

Final thoughts

Having used vim for quite some time, I was pleasantly surprised by how well VSC worked. It provided a low overhead which was convenient since my computer wasn’t the best and I dislike draggy IDEs and, the barebones nature of it was very appealing as I spent less time wrestling with settings and more time using it.


Time to build Mozilla

Another week has come and gone and with it, new knowledge has been shared, new curses have been slung and of course, the seat of my cushion indents a few more nanometers towards a well-deserved retirement. All is par for the course though as exploring any new code base, especially one as large and as complex as Mozilla Firefox takes a bit of research, a lot of frustration and a pinch of time.

My task for this week was to obtain, build, modify and display the Mozilla Firefox project. This was exciting as previously I had never worked on a project of this magnitude! I couldn’t stop thinking about how more than 40gb of code, from contributors around the world was coalescing into my laptop. A surreal experience that shows the reach of modern collaboration.

I built the project on the Ubuntu 16.10 kernel. Though I was warned about potential errors, and honestly expected there to be some, since my computer is partitioned with Windows 10 and often times this causes errors in projects, there were none and the build was successful and timely.

./mach run
Lab_2_mc_p1

You know when you do something it just.. works? Well, this was not one of those times. Having followed the instructions a bit too closely and without thinking I had made changes to ‘browser/themes/windows/browser.css’ and upon investigation noticed NONE of the changes I had made had applied. Confused I made more and more drastic changes to the same file, rebuilding and relaunching between every change, and yet still nothing.

You may have already guessed the problem. I was modifying the WINDOWS css values and not the LINUX css values, and honestly, it took me longer to figure this out than I would like to admit but having solved the semicolon of dir naming I was off to the races and quickly saw my intended results.
Lab_2_mc_p2

With the right pieces in place and cat gifs to get me through the rest of the day, I finished this lab, satisfied, but eager to explore more!
Hey!! Thanks for reading, I hope you enjoyed 🙂
As a user of Unsplash and a friend to many different artists, I would like to quickly give some credit to  Vadim Sherbakov who’s picture was used as the featured image for this post. Thanks a million and nice picture Vadim.


What the F*ck Python!


Beginning one’s journey into the massive world of open source development can leave the best of us confused and discouraged, however, by putting forth the effort and taking the time to find the right project, anyone can find a home; a community and a purpose.


With the that in mind, it was no surprise to me that the first project that caught my attention on Github wasn’t a working project but instead a collection of some common and not so common exceptions and gotchas in the Python language. WTFPython is a repository dedicated to learning the inner workings of Python through short demonstrations and output explanations. This was amazing news for someone like me who already had a huge interest in the python language!

clone_wtfpython.png

So with the prospect of picking up some useful knowledge and mitigating future Phil’s headaches, the total clone number went up by one.


3 examples that stood out for me were:

Evaluation_time
This one tripped me up for awhile but I will admit it provides a great example of evaluation time discrepancy, the ‘in’ clause is evaluated at declaration time whether as the conditional is evaluated at runtime. To understand better what was happening I took to python’s interpreter spending a few minutes replicating and reproducing the sample output.

8_times
You can modify a list while iterating over it to some interesting effect. It will iterate eight times before stopping; eight because that’s when the container needs to resize.

Isnotis
Much like in Java, python compares either by value equality ‘==’ or reference equality ‘is’ keyword denoted. This behaviour can have an interesting effect when combined with an under the hood feature of python in which integers -5 to 256 are preemptively allocated memory. The original post has the full example and explanation.


In close, I would highly recommend taking a peek at this repo. It took no time to set up and jump into the well laid out and easy to understand examples. Coming to an understanding of a complicated gotcha or successfully predicting the output to a problem felt great, and the project itself requires no commitment only a passion to learn!

10/10, would clone again.